
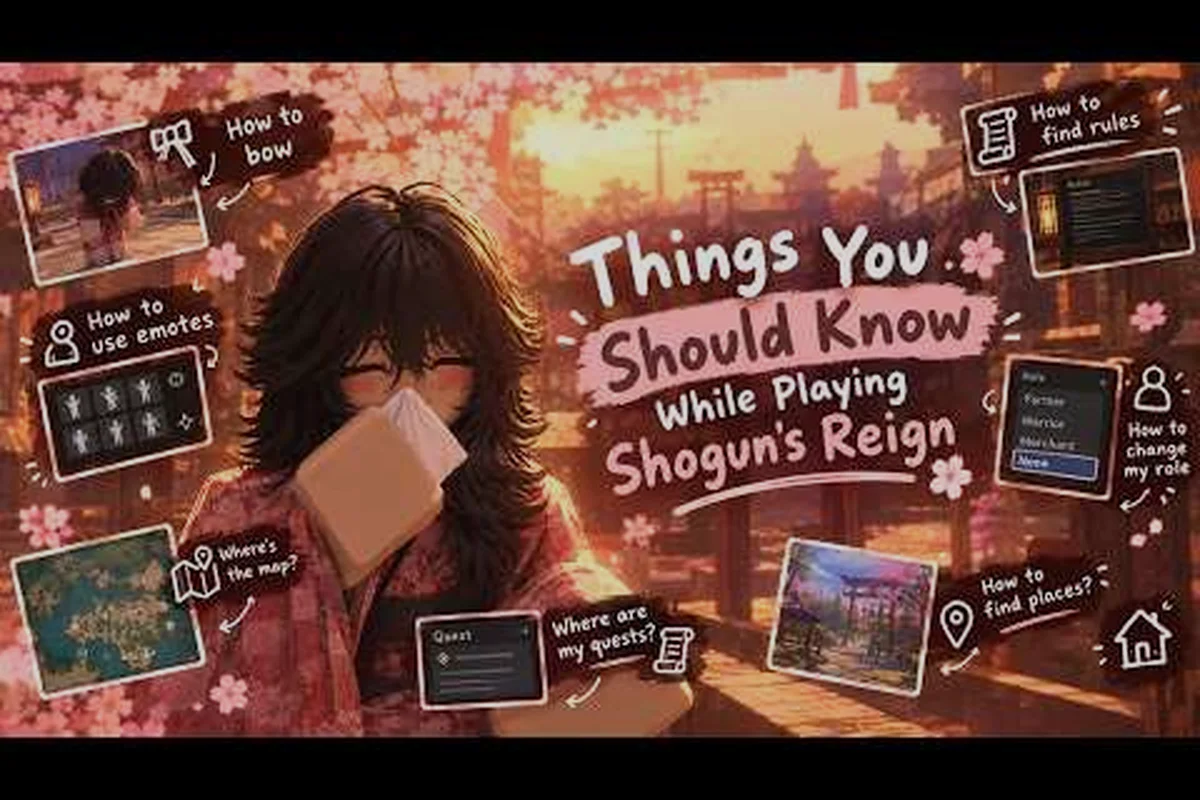
Stuck grinding the same starter zone with no clear path forward? Every Shogun's Reign objectives chain is designed as a stepwise ladder, and missing even one milestone can stall your wallet, your combat rank, and your access to late-game armor sets. This walkthrough breaks the progression system into a clean sequence so you always know what unlocks next, which tasks pay the most, and where beginners lose the most time.
If you have not yet learned the basic UI, controls, and gathering loop, start with the beginner walkthrough before tackling milestones. The beginner guide explains stamina, the in-game currency basics, and the safe routes out of the starting hub that most new players miss.
How the Shogun's Reign Objectives System Works
The objectives system in Shogun's Reign is a quest-driven progression layer that lives on top of the open-world exploration loop. Rather than locking regions behind a level cap, the game gates new zones, vendors, and combat techniques behind chains of in-game tasks. Each completed task rewards experience, in-game currency, and occasionally a Regional Reputation token that opens vendor inventories and fast-travel points.
These three layers operate on independent progression timers, which is why efficient players treat them as a parallel pipeline rather than a sequential checklist; a Mainline Task might unlock a new zone in 20 minutes, but a Regional Reputation track often requires 8–12 Regional Tasks to advance a vendor tier, and Daily Practice Tasks reset on a real-time 22-hour cooldown that cannot be banked or accelerated by in-game items.
-
Mainline Tasks — Story-driven milestones that unlock the next major zone and the boss encounters inside it.
-
Regional Tasks — Side objectives that boost your Regional Reputation and unlock vendor tiers in a specific area.
-
Daily Practice Tasks — Short repeatable objectives that grant small currency payouts and reputation fragments.
The fastest progression comes from completing Mainline Tasks in order, then farming Regional Tasks while waiting for cooldowns. According to community data, players who interleave tasks this way reach the second regional hub roughly 40% faster than players who only chase mainline quests.
| Task Layer | Primary Reward | Secondary Reward | Typical Completion Time |
|---|---|---|---|
| Mainline Tasks | Story progression, new zone access | 500–1,500 currency, 1 Regional Token | 15–30 minutes each |
| Regional Tasks | Regional Reputation (+1 per task) | 100–300 currency, vendor unlocks | 5–10 minutes each |
| Daily Practice Tasks | Currency fragments, minor XP | Reputation shards | 2–4 minutes each |
A common rookie mistake is to ignore Regional Tasks while grinding the mainline. The Regional Reputation track is what unlocks the second-tier vendor, and that vendor sells the only early-game armor set with a meaningful damage-reduction bonus. Skipping regional grinding means you will overstay the starter tunic well past the point where it can keep you alive.
Early-Game Milestones to Hit First
The first hour in Shogun's Reign is front-loaded with objectives that look optional but are actually mandatory for smooth progression. The starter hub quest-giver offers four tasks the moment you log in, and the order in which you complete them changes how fast your wallet fills.
Step 1: Complete the Hub Tutorial Tasks
The four starter tasks in the hub teach movement, gathering, and basic combat. They are quick, they pay out a combined 800 currency, and they unlock the Outskirts Gate — your first fast-travel point. Skipping any of them disables the gate trigger, which forces you to run back through the starter zone on foot every time you die.
Step 2: Unlock the Gathering Skill Node
After the tutorial, the Gathering Skill Node sits in a small shrine just outside the hub. Activating it is technically a Regional Task, but it counts as a milestone because it permanently increases the yield of every resource node you harvest for the rest of the run. Community testing shows the bonus is roughly +15% yield, which compounds significantly over the course of a full session.
Step 3: Reach Reputation Tier 2 in the Starting Region
Tier 2 vendor access is the single biggest power spike in the early game. Tier 2 sells the Iron-Woven Tunic, an armor piece that reduces incoming damage by about 12% and unlocks at 8 Regional Reputation points. The starting region offers 12 Regional Tasks total, so you only need to clear two-thirds of them to hit the threshold. According to community data, most players reach Tier 2 within 35–45 minutes if they pick up tasks as they explore rather than backtracking later.
| Milestone | Approximate Time to Complete | Currency Earned | Key Unlock |
|---|---|---|---|
| Hub Tutorial (4 tasks) | 10 minutes | 800 | Outskirts Gate fast-travel |
| Gathering Skill Node | 5 minutes | 150 | +15% resource yield (permanent) |
| Reputation Tier 2 | 35–45 minutes | 1,200+ | Iron-Woven Tunic armor set |
| First Boss Defeat | 25 minutes | 1,000 | Access to second regional hub |
Players who skip the tutorial tasks often find themselves stuck in a currency drought within the first 20 minutes. The Outskirts Gate alone saves roughly five minutes of running per death, and the Gathering Node bonus pays for itself within the first resource loop.
Mid-Game Progression Targets
Once you have cleared the starter region and crossed into the second hub, the objective structure opens up. Three new regional hubs become available, each with its own Mainline Task chain and its own Regional Reputation track. The mid-game is where most players get lost, because the three hubs are technically parallel rather than sequential.
Choosing the Order of Regional Hubs
Each mid-game hub in Shogun's Reign is designed around a distinct gameplay loop, and choosing the right order directly affects how quickly you unlock the parry, traversal, and gathering passives that the late-game Shogun's Reign objectives require. Coastal mainline tasks, for example, teach the 0.4-second parry window reused in every boss arena, while Mountain climbing routes unlock the Sky-Step Boots that every speedrun route assumes you already have; Forest gathering contracts feed directly into the crafting reagent sink for the Wave-Cutter Katana upgrades. Picking an order that front-loads combat training therefore compresses your overall progression timeline by roughly 10–15% compared to a random route.
-
The Coastal Hub — Combat-focused, with mainline tasks that test your sword timing and unlock the Wave-Cutter Katana weapon set.
-
The Mountain Hub — Exploration-focused, with mainline tasks centered on climbing routes and hidden shrines. It is also where you unlock the Sky-Step Boots that enable mid-air dash recovery.
-
The Forest Hub — Gathering-focused, with mainline tasks that reward wood, herbs, and crafting reagents. It is the only hub that offers repeatable gathering contracts.
| Hub | Primary Reward | Recommended Player Level | Time to Clear |
|---|---|---|---|
| Coastal | Wave-Cutter Katana, +5% sword damage passive | 8+ | 45–60 minutes |
| Mountain | Sky-Step Boots, mid-air dash unlock | 9+ | 50–70 minutes |
| Forest | Gatherer passive (+20% herb yield) | 8+ | 40–55 minutes |
The optimal order depends on your playstyle, but community consensus is to clear the Coastal hub first. Its combat mainline tasks teach the parry window that every late-game boss fight relies on, and the Wave-Cutter Katana remains relevant well into the final region. If you are unsure about the travel routes between hubs, the mountains travel guide maps out the fastest paths and the safest rest points along the way.
Combat and Gear Milestones
Combat objectives in Shogun's Reign are tied to two parallel progression systems: the Combat Rank track, which unlocks new sword techniques, and the Armor Mastery track, which boosts the damage reduction of equipped gear. Both tracks feed into the same late-game power curve, so ignoring either one slows you down.
Combat Rank Milestones
Combat Rank increases every time you defeat an enemy using a specific technique tied to your katana stance, and progression is gated by tracked combat events rather than raw enemy kills. Each rank demands a different input category — parry timing, counterattack chains, or multi-target clears — so you cannot grind one stat and expect later ranks to unlock automatically. The first three ranks, in order, are:
-
Rank 1 — Deflect — Unlocked at 25 parry successes. Required for the Coastal mainline boss.
-
Rank 2 — Riposte — Unlocked at 15 successful counterattacks. Required for the Mountain mainline boss.
-
Rank 3 — Whirlwind Slash — Unlocked at 50 multi-enemy clears. Required for the Forest mainline boss.
If you want a deeper breakdown of how each technique works and which enemy types reward the most progress, the combat breakdown covers parry windows, stamina management, and the enemy attack patterns you should learn first.
Armor Mastery Milestones
Armor Mastery is a stacked progression system where each tier builds on the previous one, so the first two masteries are deliberately tuned as the entry ramp rather than late-game spikes. The Iron Mastery threshold of 50 hits in the Iron-Woven Tunic is calibrated to roughly two full Shogun's Reign dungeon runs at Tier 2, while the 75-hit Lacquered Mastery typically requires three to four Tier 3 vendor runs, making early armor investment a prerequisite for unlocking the Coastal and Mountain boss checks listed below.
-
Iron Mastery — 50 hits taken in the Iron-Woven Tunic. Unlocks the Iron-Woven Shoulder Plates.
-
Lacquered Mastery — 75 hits taken in the Lacquered Set (unlocked at Tier 3 vendors). Unlocks the Lacquered Helmet.
Armor Mastery feels like a punishment system at first because you are intentionally tanking damage, but the resulting set bonuses are too strong to skip. The Iron-Woven Tunic with shoulder plates reduces incoming damage by roughly 18% total, which is the difference between one-shot deaths and survivable encounters in the late game.
| Milestone | Requirement | Unlock | Power Level Impact |
|---|---|---|---|
| Deflect Rank 1 | 25 parries | Parry timing tutorial | Required for Coastal boss |
| Riposte Rank 2 | 15 counters | Counter window +0.2 sec | Required for Mountain boss |
| Iron Mastery | 50 hits in Iron set | Shoulder Plates | -6% additional damage taken |
| Lacquered Mastery | 75 hits in Lacquered set | Lacquered Helmet | -4% additional damage taken |
Swapping armor the moment a new tier unlocks is one of the costliest misplays in the Shogun's Reign progression loop, because it resets your Mastery stack to zero and forces you to re-absorb 50 Iron-Woven hits and 75 Lacquered hits from scratch. The optimal pattern is to keep your current set equipped until you cross the next Mastery threshold, then swap — for example, finishing the Lacquered Mastery inside the Tier 3 vendor grind before touching the Coastal boss unlock, so your -4% damage reduction stacks cleanly onto the Iron set's -6% instead of clobbering it. This sequencing is also the only way to keep the Shoulder Plates and Lacquered Helmet procs aligned with the Deflect Rank 1 and Riposte Rank 2 parry windows required for the Coastal and Mountain boss checks, since the parry timing tutorial only triggers after the 25-parry milestone is reached.
Late-Game Objective Chains
Once all three mid-game hubs are cleared, a single combined Mainline Task unlocks that sends you to the final region: the Shogun's Citadel. Because the Citadel drops the branching structure used in every prior zone, your objective order is fixed into a linear five-stage chain — Citadel Gates, Inner Courtyard, War Council Chamber, Shogun's Sanctum, and the Final Duel. Each stage gates the next behind a specific sub-objective (skirmish clear, ritual defense, boss elimination), so skipping ahead is impossible and backtracking rewards are disabled outside of vendor reset cycles. This linearity is what makes the Shogun's Reign late-game arc the shortest in the game despite housing the toughest encounter checks.
Citadel Unlock Chain
The Citadel, the central late-game hub tied directly to the shogun's reign objectives progression track, only becomes accessible once all three concurrent prerequisites on this unlock chain are finished within the same in-game week, because the lockout system ties the hub's availability to a server-side flag (citadel_flag_unlock) that checks completion of the Coastal Warlord, Sky-Piercing Tower, and Cartographer herb-delivery quest states simultaneously.
-
Defeat the Coastal Warlord boss.
-
Climb the Sky-Piercing Tower in the Mountain hub.
-
Deliver 30 Forest herbs to the Cartographer NPC.
Each prerequisite takes roughly 25–35 minutes, and they can be completed in any order. According to community data, the herb delivery is the fastest of the three and is the recommended starting point for solo players because it does not require combat preparation.
Final Boss Preparation
The Citadel mainline culminates in a four-phase boss fight against the Shogun's Warden, where each phase introduces a new attack pattern and arena hazard that demands a full loadout check before engagement. The recommended gear loadout going in is calibrated around the Warden's Phase 4 combo, which chains four unblockable strikes back-to-back: stacking the Fortune Charm's drop-rate passive helps you cycle through Healing Salve procs during the brief recovery window, while the Wave-Cutter Katana +2's Bleed Affinity lets you cut the Phase 2 shield gate in roughly 12 hits instead of the standard 18. Skipping any single slot — most often the Lacquered Set's Tier 3 plating — drops your damage resistance below the 35% threshold needed to survive the Shogun's Judgment arena-wide sweep in Phase 3, turning a winnable run into an immediate reset.
| Slot | Recommended Item | Source |
|---|---|---|
| Weapon | Wave-Cutter Katana +2 | Coastal vendor, Tier 3 |
| Armor | Lacquered Set (full) | All mid-game hub vendors, Tier 3 |
| Trinket | Fortune Charm | Citadel pre-boss chest |
| Consumable | 6x Healing Salve | Forest hub crafting bench |
Players report that underestimating the consumable count is the most common cause of Citadel wipes. The final phase drains roughly 80% of your health in a single combo, and the only safe window to heal comes after that combo lands. Bring two extra salves beyond what feels comfortable.
Common Mistakes That Stall Progression
Veteran players routinely hit progression walls in Shogun's Reign because the objective system silently tracks Regional Task completion, armor Mastery chains, and Outskirts Gate tiers — missing any single pillar in a hub triggers cascading penalties during fast-travel and contract payouts. The four stalls below cost between 15 and 25 minutes each to repair, so recognizing the pattern early is the difference between a smooth Mastery curve and a full reset run.
-
Backtracking for skipped Regional Tasks — Each backtrack costs 3–5 minutes of travel time. Always grab Regional Tasks before leaving a hub.
-
Swapping armor before hitting Mastery thresholds — Resets progress and wastes the hit-count investment.
-
Ignoring gathering contracts — Forest hub contracts pay 2x the normal currency rate and stack with Regional Reputation gains.
-
Failing to upgrade the Outskirts Gate — The gate has three upgrade tiers, each reducing fast-travel cooldown by 10 seconds.
| Mistake | Time Cost | Fix |
|---|---|---|
| Skipping Regional Tasks in starter hub | 15–20 min backtrack later | Grab all 12 starter tasks before leaving |
| Swapping armor at Tier 2 | 20+ min wasted hits | Stay in Iron-Woven Tunic until Mastery |
| Skipping gathering contracts | 400–600 currency lost | Accept every Forest contract on sight |
| Leaving Outskirts Gate at Tier 1 | 20 sec per fast-travel | Spend the 200 currency upgrade early |
Customization Unlocks Tied to Objectives
Armor sets and weapon skins in Shogun's Reign are not just cosmetic — many are gated behind objective completion. The most valuable customization unlocks, including the Legendary Ironforge Pauldrons and the Crimson Blossom Greatskin, drop exclusively from Mainline Task chains rather than vendor purchases, which means skipping Core and Side Quest progression locks you out of roughly 70% of premium cosmetic loot. Players who focus only on faction reputation or crafting milestones will find their wardrobe catalog stays permanently under 30% completion, since Mainline chapters hand out regional tokens and a 3% XP boost toward allied factions as completion bonuses that vendors never offer.
-
Tide-Worn Armor Skin — Reward for completing 100% of Coastal Regional Tasks.
-
Mountain Sage Outfit — Reward for reaching Reputation Tier 4 in the Mountain hub.
-
Forest Wanderer Set — Reward for delivering 50 Forest herbs to the Cartographer.
For a full visual loadout plan, the customization guide catalogs every outfit, the precise objective or Mainline Task chapter that unlocks it, and the fastest path to each one — for example, the Tide-Worn Armor Skin is gated behind 100% Coastal Regional Tasks completion, so players who skip Regional Tasks in the Coastal hub should detour there before attempting any Crimson Blossom Greatskin farm, since both share token dependencies that reset if the chapter is abandoned mid-progression.
Frequently Asked Questions
What is the fastest way to earn currency in Shogun's Reign?
Forest gathering contracts are the highest currency-per-minute activity in the game. Each contract pays 200–300 currency and takes 3–4 minutes, which works out to roughly 60 currency per minute. That is double the rate of combat grinding on starter enemies, and it stacks with Regional Reputation gains.
How do I unlock the second regional hub?
You need to complete the starter hub Mainline Tasks, reach Reputation Tier 2, and defeat the Coastal Outpost boss. The boss spawns after the Coastal mainline quest triggers, and the gate to the second hub opens the moment the boss is defeated. Total time to reach this point is roughly 90 minutes for an average player.
Can I replay objectives to farm rewards?
Mainline Tasks are one-time only, but Regional Tasks and Daily Practice Tasks reset on a server cycle. Regional Tasks refresh every 4 hours and Daily Practice Tasks refresh every 24 hours. The fastest farming loop is to log in, clear all active Regional Tasks in your current hub, then log out until the next refresh.
What happens if I die during a Mainline Task?
Nothing permanent. You respawn at the last fast-travel point you activated, and the task progress is saved. The only penalty is travel time back to where you died, which is why upgrading the Outskirts Gate early is so important — it cuts that respawn run significantly.
Where can I find more Shogun's Reign help if I get stuck?
The official Shogun's Reign Roblox page covers the basic FAQ, and community-tested guides like the ones in this site cover milestone-specific strategies. If you want to test builds in a private setting before committing to a public server, the private server setup guide walks through enabling a solo instance and configuring spawn rules.